Blog Content

13
Jun
2026
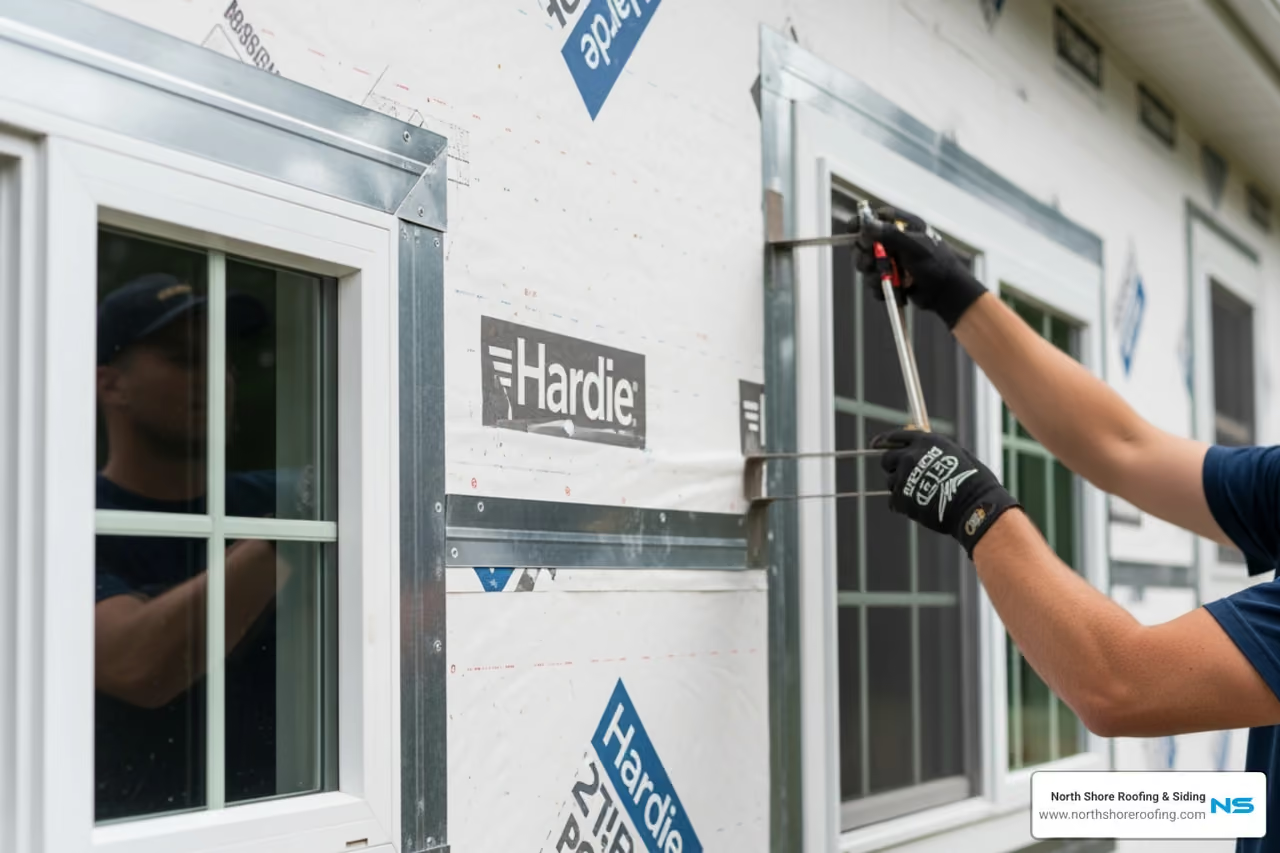
Hardie siding flashing is the system of metal and membrane layers that stops water from getting behind your fiber cement siding — and it's one of the most important parts of any siding installation.
Quick answer — how Hardie siding flashing works:
Homes across Queens, Long Island, and communities like Port Washington and Bayside take a beating from nor'easters, heavy summer rain, and freeze-thaw cycles every year. When flashing is missing, undersized, or done wrong, water finds its way behind the siding — often undetected for years. The damage to sheathing, framing, and insulation can be severe and expensive. Learn more about our professional siding installation services in Long Island here.
No exterior cladding — not even fiber cement — can stop 100% of water intrusion on its own. That's why the flashing system behind your Hardie siding is doing so much of the heavy lifting.
This guide covers exactly what James Hardie requires, what the building code demands, and why professional installation in Queens and across Long Island is the only way to protect your home and your warranty.

Simple hardie siding flashing word guide:
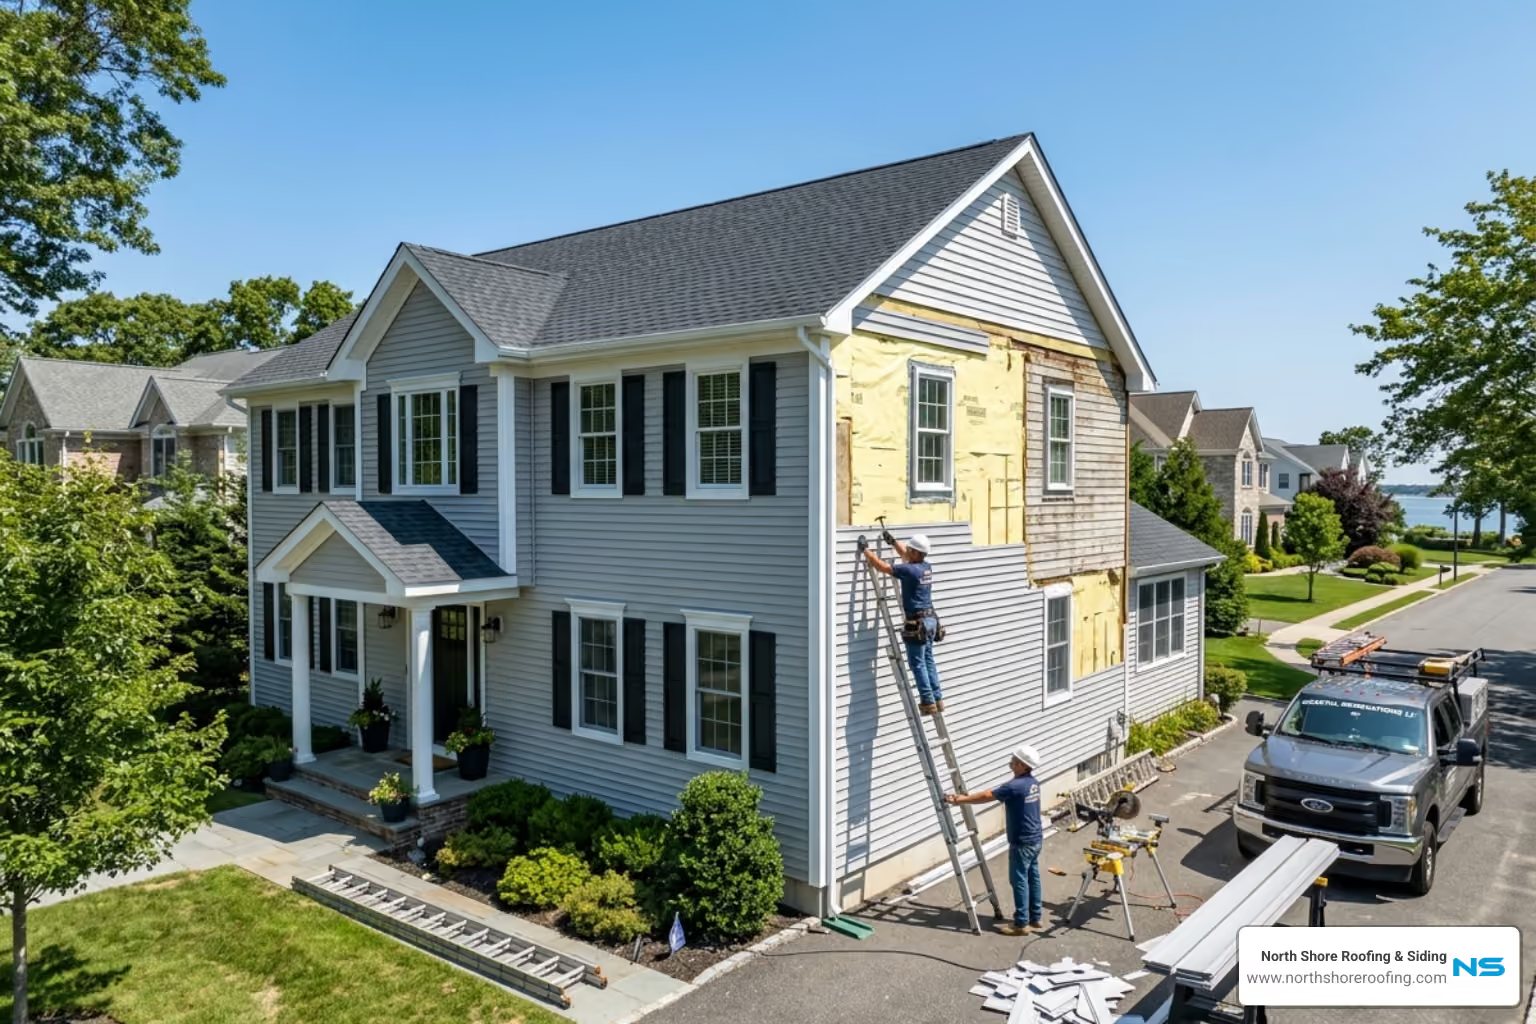
When we talk about moisture protection in May 2026, we aren't just talking about keeping the rain out; we are talking about managing the water that inevitably gets behind the siding. Hardie siding flashing acts as a stalwart sentinel, creating a clear drainage plane that directs liquid down and away from your home's structural components.
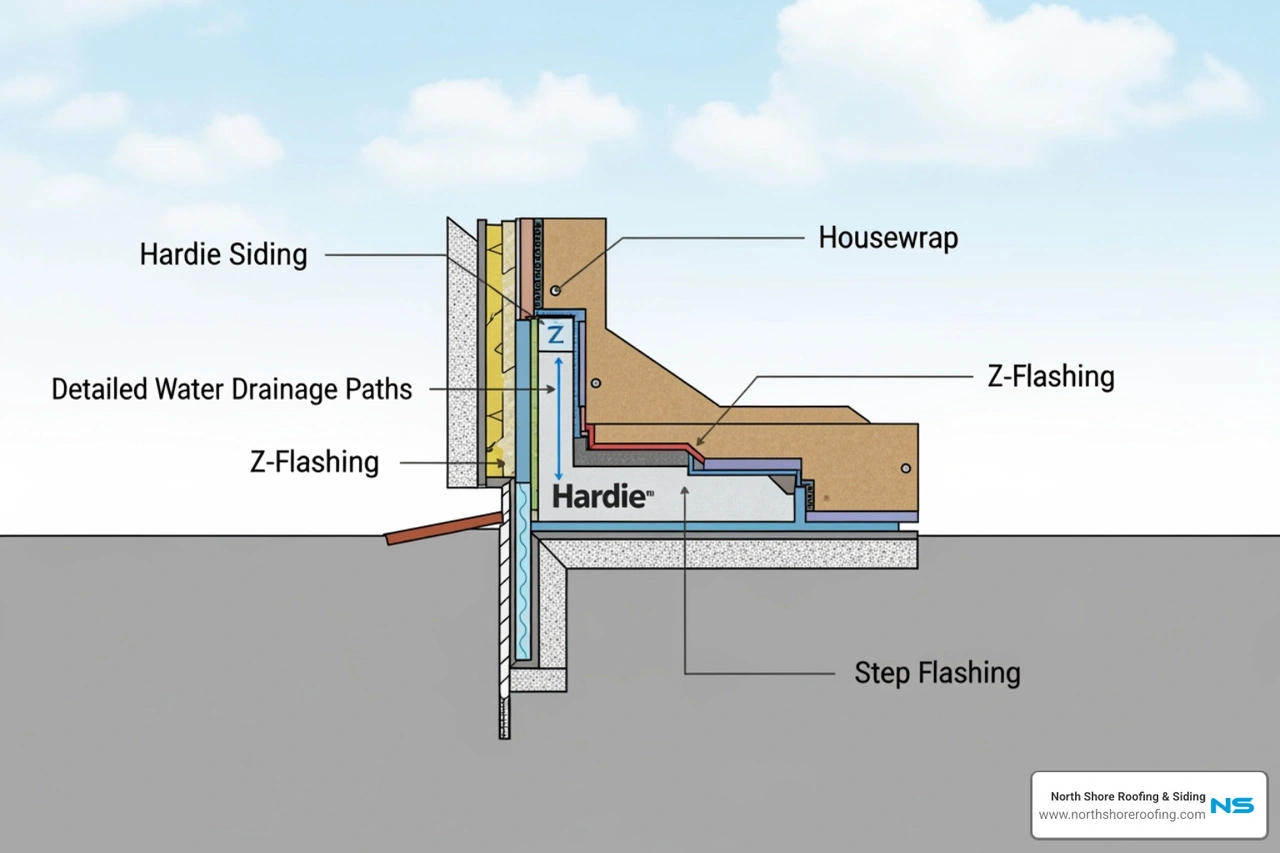
In the industry, we often say that flashing is the most underrated component of a building enclosure. Without it, water can become trapped behind the planks, leading to rot, mold, and structural decay. This is especially true for Long Island Siding Replacement projects where older homes may have outdated moisture barriers.
The International Residential Code (IRC) R703.10.2 sets the legal baseline for these installations. It requires lap siding to have a minimum vertical overlap of 1.25 inches (31.75 mm). This overlap works in tandem with the flashing to ensure that gravity does the work of shedding water. For a high-quality Queens Roofing Siding Install, adhering to these codes isn't just a suggestion; it’s a requirement for a safe, dry home.
According to the HardiePlank Installation Inst_HZ10, James Hardie strongly recommends joint flashing as the primary treatment for butt joints. While codes allow for caulking or H-jointers, flashing is superior because it requires zero maintenance and doesn't age or crack like sealant does.
The specific requirement is a 6-inch wide joint flashing piece that overlaps the course below by at least 1 inch. When we install this in areas like Port Washington, Flushing, or Bayside, we ensure the planks are butted together in moderate contact. This creates a tight, aesthetically pleasing joint that remains waterproof even as the house settles or the temperature changes.
Not all metals play nice with fiber cement. Because James Hardie products are cement-based, they can react with certain raw metals. We recommend using aluminum or high-quality painted coil stock. These materials are non-reactive and provide the durability needed to last for decades.
Using Hardie™ Weather Barrier Products | James Hardie like Pro-Flashing and Flex Flashing provides an integrated system that balances water resistance with breathability. In coastal or humid areas like Locust Valley and Manhasset, we also insist on using stainless steel fasteners to prevent corrosion and "bleeding" stains on your beautiful new siding.
The most common area for catastrophic water damage isn't the middle of a wall—it's where the roof meets a side wall. Without proper hardie siding flashing, water running down a roof slope can pour directly into the wall cavity.

For a robust Long Island Roofing Siding Install, we use a combination of step flashing and a kickout diverter. A kickout diverter is a specialized piece of flashing that "kicks" water away from the siding and into the gutter. Per IRC R905.2.8.3, this flashing must be a minimum of 4 inches by 4 inches and angled between 100 and 110 degrees to effectively deflect water. This is a non-negotiable step for homes in Port Washington, Flushing, and Bayside where heavy rain is common.
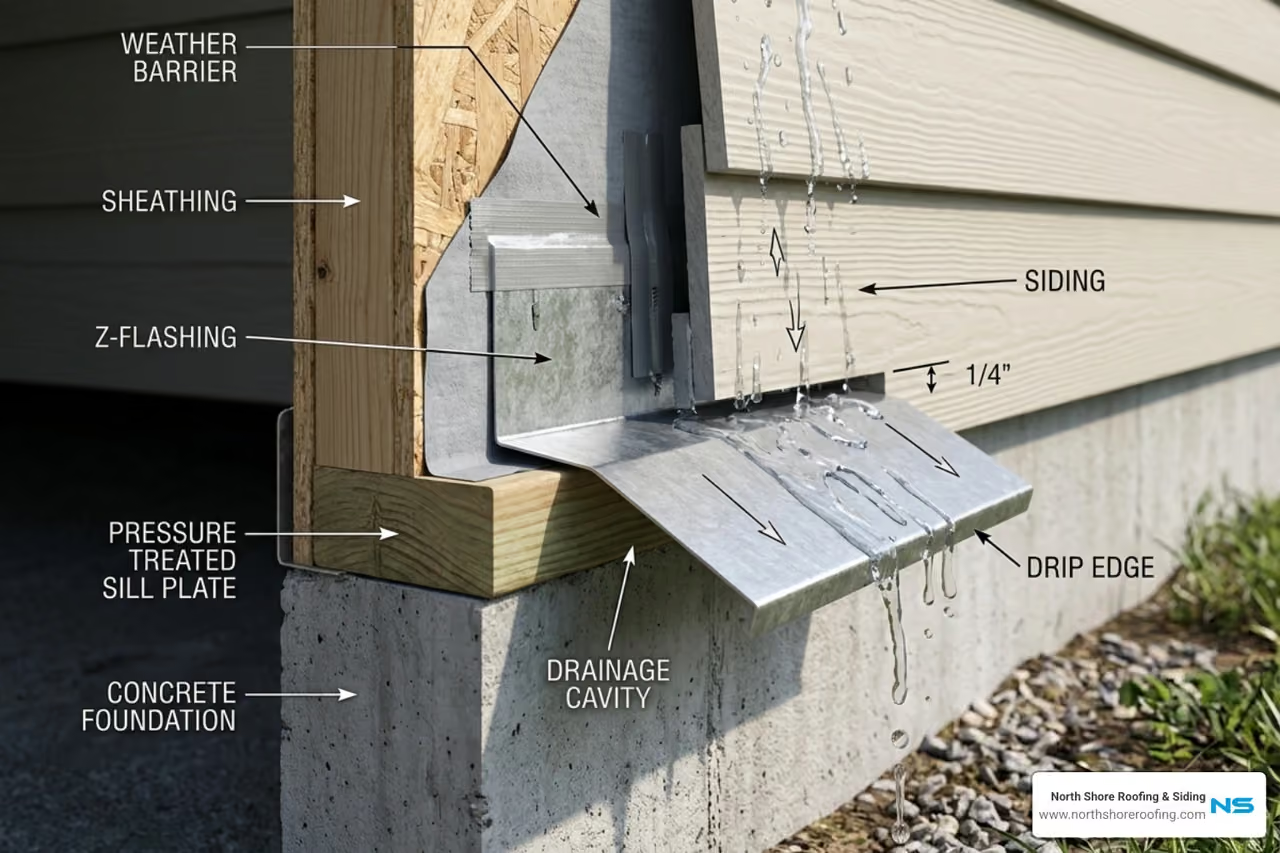
When we install horizontal trim, such as band boards or decorative frieze boards, we must use Z-flashing. This metal "Z" shape sits over the top of the trim board and tucks behind the siding above it.
One of the most common mistakes we see in Locust Valley and Manhasset is contractors caulking the gap between the siding and the horizontal flashing. The HardieTrim 4-45-4Installation InstHZ101 guide is clear: you must maintain a 1/4-inch gap above all horizontal flashing surfaces and leave it un-caulked. This gap allows any moisture that gets behind the upper siding to drain out.
The standard 8.25-inch HardiePlank is a favorite across Queens and Long Island. For this specific size, specialized junction flashing is often used. This HardiePlank® Junction Flashing for 8¼" Siding usually measures 6" x 8" x 1/4" and is made of primed aluminum.
To ensure a straight and consistent installation, we always start with a 1.25-inch starter strip at the bottom of the wall. This ensures the first course of siding has the correct "lap" angle, which is essential for the 1.25-inch vertical overlap required by code to shed water effectively.
James Hardie offers an industry-leading 30-year warranty, but there's a catch: it only stays valid if the product is installed exactly to their specifications. One of the quickest ways to void that warranty is by using caulk where you should have used hardie siding flashing.
Many "jack-of-all-trades" contractors in Port Washington or Bayside will caulk butt joints or horizontal overlaps. This is a major error. Caulk eventually fails, cracks, and traps water against the fiber cement. James Hardie recommends against caulking butt joints, especially on ColorPlus technology products, because the caulk and the siding weather at different rates, leading to an ugly, visible line over time. Instead, rely on the Siding Installation Services NYC experts who know how to use joint flashing correctly.
Water management isn't just about the flashing on the wall; it's about how the siding interacts with the rest of your home. Maintaining proper clearances is vital to prevent "wicking," where the fiber cement absorbs moisture from standing water or snow.
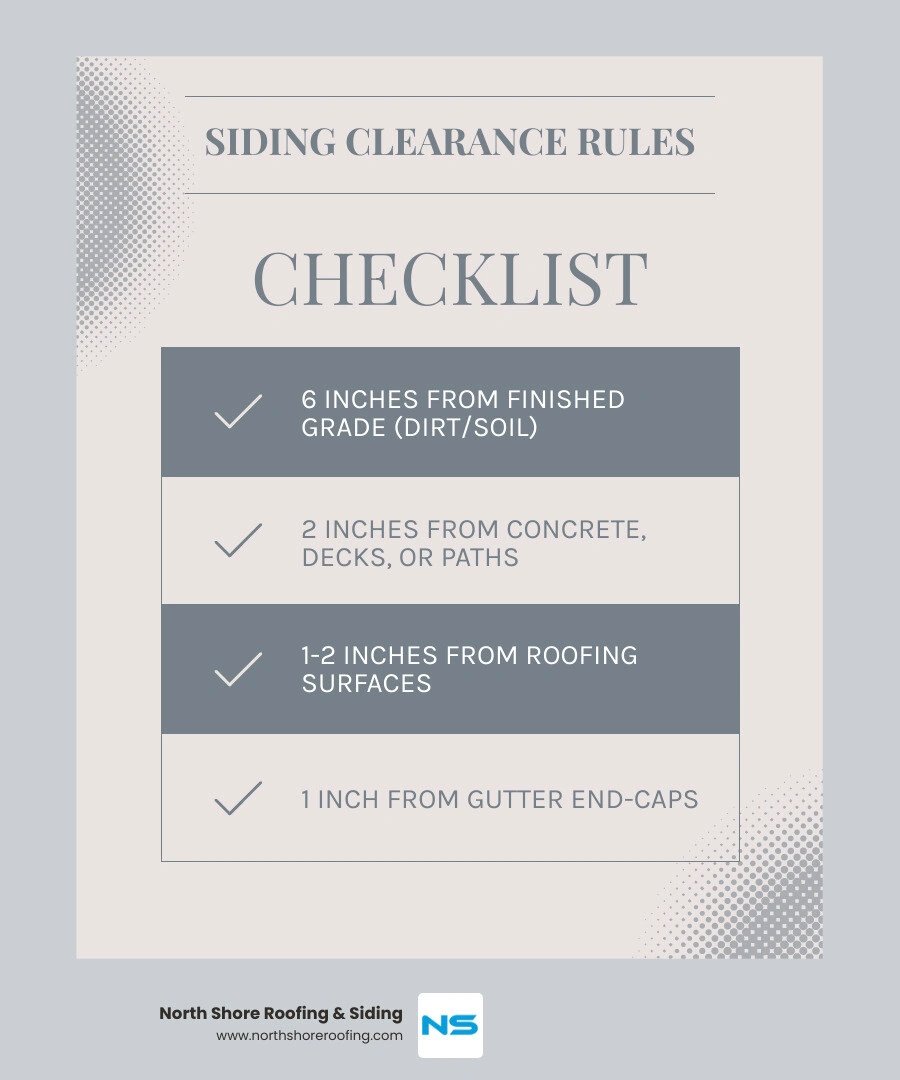
In Locust Valley and Manhasset, where snow can pile up against a house, these clearances are the difference between a siding job that lasts 30 years and one that fails in five. We also ensure that the grade slopes away from the house at least 6 inches within the first 10 feet to keep water from pooling at the foundation.
Installing Hardie siding isn't a weekend DIY project. Beyond the complex flashing requirements, there are significant safety concerns. Fiber cement contains respirable crystalline silica. When cut with a standard saw blade, it creates a fine dust that is a known carcinogen.
Professional teams, like ours at North Shore Roofing & Siding, follow strict safety protocols. We use specialized HardieBlade saw blades and HEPA-filtered vacuum systems to capture dust at the source, as outlined in the HardiePanel Installation InstHZ51 .
Furthermore, we stay updated on the latest technical bulletins from James Hardie. Local building codes in Queens and throughout Long Island are constantly evolving, and our certified installers ensure every project is fully compliant and built to last.
Flashing is a "permanent" solution. Caulk is a maintenance item that requires periodic removal and reapplication. Flashing provides a physical barrier that directs water out and down, whereas caulk can trap moisture if it fails. Additionally, for ColorPlus products, flashing allows for a cleaner, more attractive joint without the visible mess of sealant.
Yes, if there is a panel joint or a break in the weather barrier behind that trim. Even if the trim is purely decorative and attached to the face of the panels, we often recommend Z-flashing to prevent water from pooling on top of the trim board, which could lead to "wicking" and damage over time.
Per the IRC and James Hardie's technical specifications, kickout flashing must be at least 4 inches high and 4 inches wide. It should be angled between 100° and 110° to ensure that water is directed away from the siding and into the gutter system.
Getting your hardie siding flashing right is the most important step in protecting your home from the variable weather of the Northeast. From the wind-driven rains of Bayside to the heavy snows in Locust Valley, your siding is only as good as the flashing system behind it.
At North Shore Roofing & Siding, we bring local expertise and certified precision to every job. Whether you are in Port Washington, Flushing, or Manhasset, our team is dedicated to exceeding expectations with honest pricing and proven installation techniques. Don't leave your home's "envelope" to chance—trust the pros who understand the unique needs of Queens and Long Island homes.
Ready to upgrade your home with the best moisture protection in the business? Explore our Siding Installation Services NYC and let us help you build a home that stays dry for decades to come.

Copyright 2022 North Shore Roofing & Siding | All Rights Reserved | Sitemap | Website by Plumb Development a Digital Marketing Agency